All work is shown framed to enhance both aesthetics and durability. The frames are hand made in keeping with the paintings which are hand made articles themselves. It is appropriate to continue the hand made theme throughout the entire work. The frame attribution is stamped on the back with the Artist’s personal stamp.
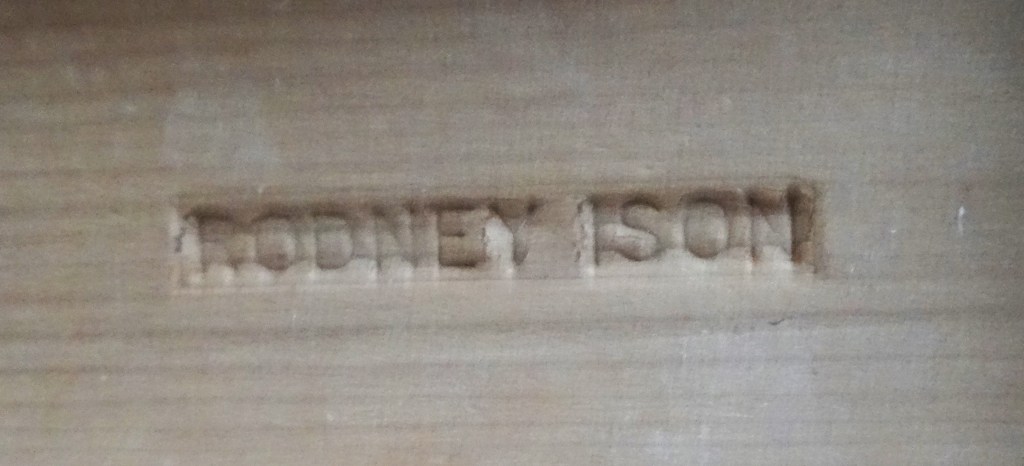
My personal identification stamp. The name is engraved to the edge of a piece of hardened steel. The steel forms a punch. The mark is made in the wood by a hammer blow to the top of the punch.
It was common in the past for craftsmen to identify their work with a punch mark. This has been found on all types of objects in wood and also on card.
Materials Used
Paper and Card: The paintings are executed on acid free paper. These papers are free of lignic acid which would cause deterioration. The dyes are light fast. The framing is carried out to conservation standard using safe materials and techniques, ensuring protection for the long term. All paintings are backed with acid free backing boards which play an important role in preventing contamination. They preserve the integrity of the artwork.

Some papers I use. There is a wide variety of pastel paper available. Some are made from de-acidified wood pulp which are perfectly safe. The artist prefers paper made from cotton rag. This is neutral ph without being deacidified. My current favourite is the top paper shown. This is ‘Stonehenge’ khaki paper made in America from cotton rag.
Frame Timber: The frames are made from various woods according to style and availability. Lime and tulip are excellent for carving. Cedar is good for moulded shapes. A versatile wood for all purposes is African Obeche or Samba. It takes carving and moulding equally well. The surface is consistent and blemish free. It has the advantage of coming from sustainable sources.
The Framing Process
The Frame Carcass: This is carefully designed and cut and joined to size. Moulded profiles are shaped using antique, beech-wood planes. Carving is carried out with woodcarving gouges and chisels. Extra depth to the frame carcass is added with bracing (cradling) pieces.
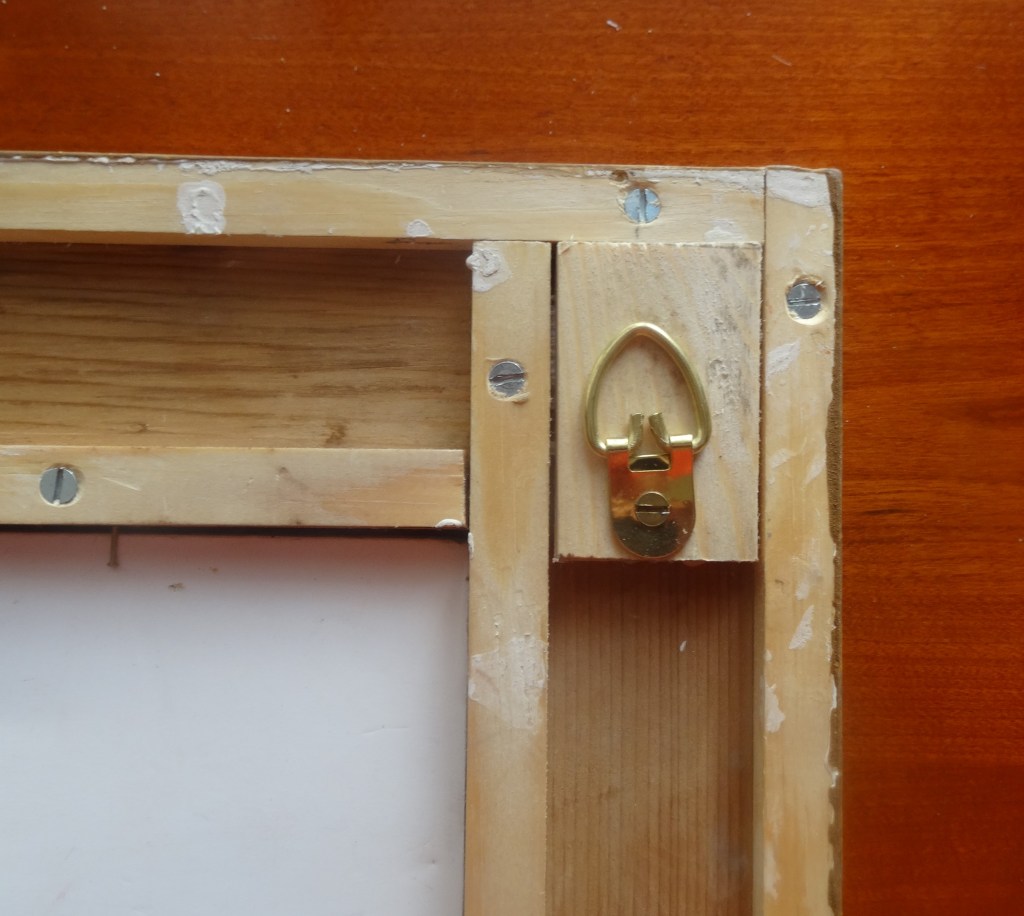
Showing how bracing pieces are added to the rear of the frame. These add extra depth where it is required. They also strengthen the frame without excess added weight. Here the pieces have been fixed by screws. A suitable glue without screws can also be used. A corner piece was added to give strength to the mitered, corner join. It also allows safe fixing of the hanging device.
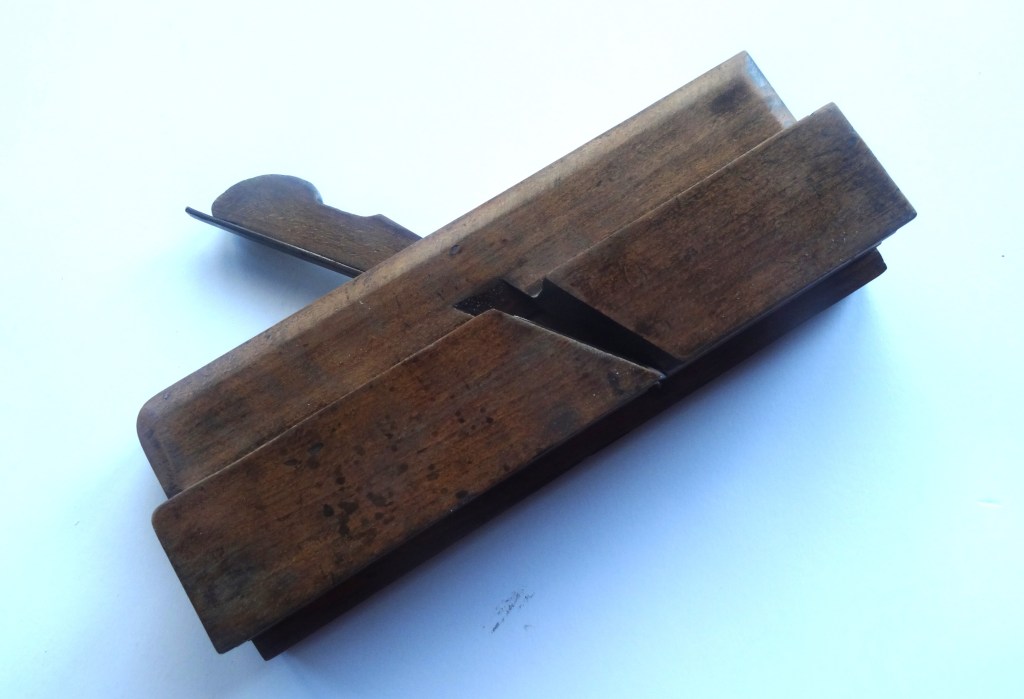
Here is an example of a beech-wood plane. This one is about 150 years old. It cuts the shape of the moulded sections of the frame. These are then mitered and joined to form a frame. This is glued to the flat part of the frame in its place.
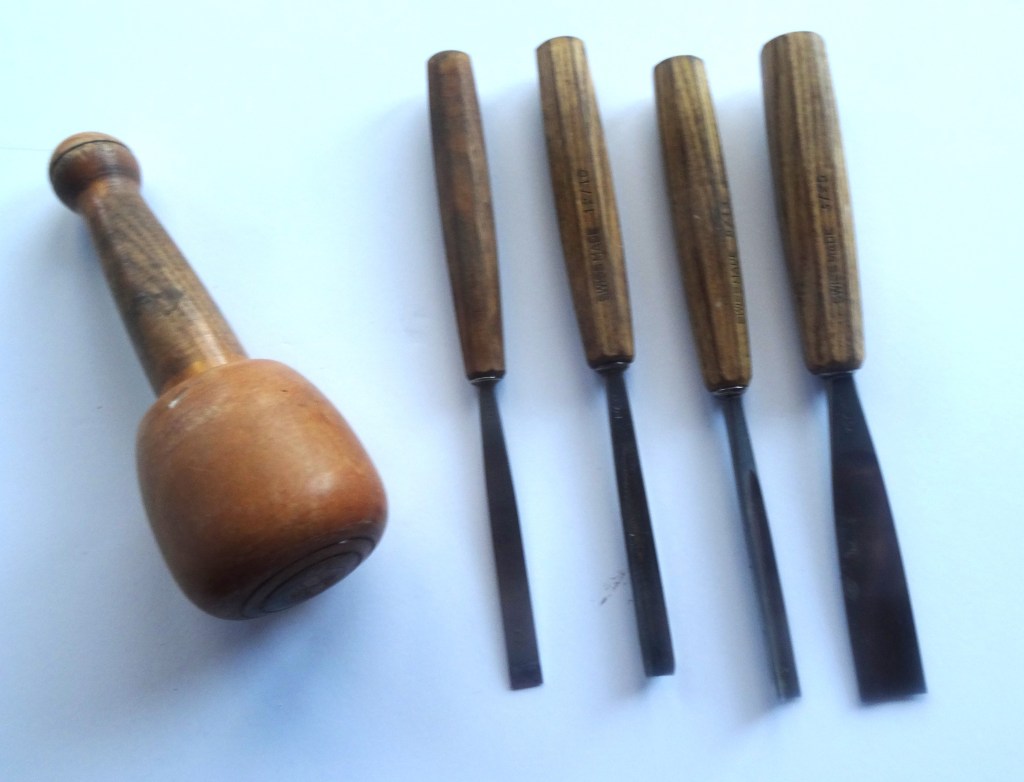
Shown are carving tools and a wood-carver’s mallet in Lignum Vitae wood. This is a dense wood that is self lubricating. The tools are, left to right, a wood-carver’s chisel, a v parting tool and two gouges. Carving tools are laid out with the cutting edge facing the carver. This allows easy identification when selecting new ones.
Care and Attention: Additionally there are spacers between the glass and the painting to prevent contact with the glass. This effectively prevents any potential damage from moisture or friction. The glass used is UV glass which provides over 90% protection from ultra violet light. This is damaging to works on paper causing fading. It allows for safe showing of the artwork. Meticulous attention to detail in the framing process demonstrates dedication. We are committed to maintaining the highest quality of presentation and conservation.
Frame Finishes
The Result Required: Wherever possible and practical traditional materials and techniques are used. Sometimes an effect is best achieved using a more modern approach. Imitation gold, or metal leaf, is a recent development. It can be used to produce effects not possible in gold. Similarly, bronze powders can be used to good effect. The result depends upon skill of handling and the ingenuity employed. Equally, coloured varnish or paint used judiciously can be all that is needed.
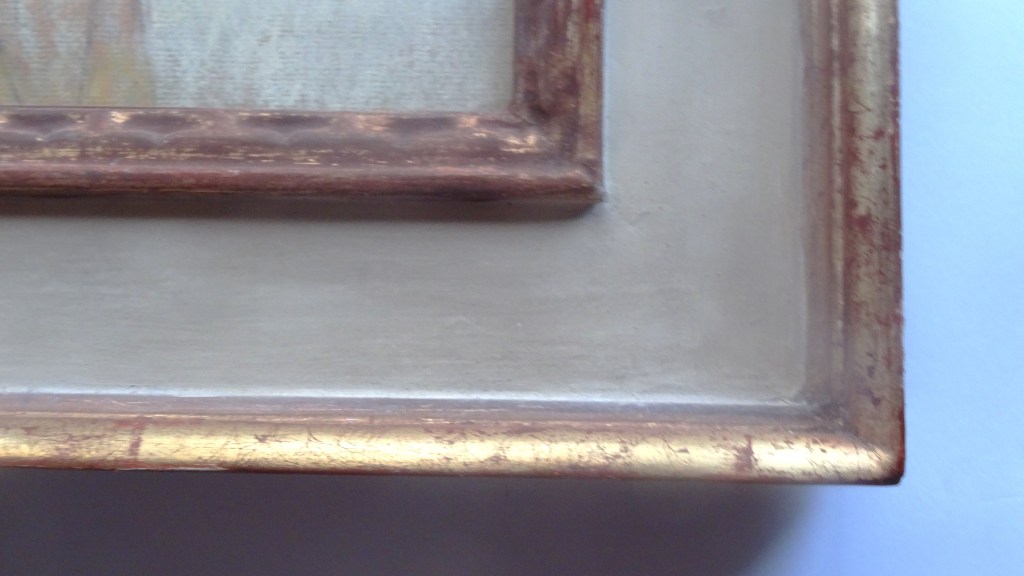
An example of a finish using metal leaf. The leaf is made using mainly copper and tin to imitate gold. It is thicker than gold and requires a different technique to lay it. This method, using water leafing, produces a unique finish. This permits burnishing of the leaf. The leaf tarnishes in air so must be protected. Here a coloured, shellac varnish has been used to darken the metal leaf.

A close up of the frame shown above. This shows the aged patina of the gilding. Gold can’t be used to achieve this finish. Where a darker effect is wanted, gold is best not modified with coloured varnish. Its beauty should stand on its own.

A sheet of metal leaf on a pallet with a velvet covered guide baton. Metal leaf is double the size of gold leaf. It can be used with the baton or cut into quarters for laying like gold leaf. The three gilders tips shown for working with metal leaf are badger hair.
The Gilded Frame
First Steps: After the carcass has been constructed it is degreased by washing. A mild bleach like oxalic acid is used. The frame is rinsed in clean water to remove all traces of bleach and left to dry. These steps guarantee good adhesion of the applied coatings.
The Gesso Coating: The first coat is rabbit skin glue size with a little chalk. This is necessary to seal the pores of the wood. Then up to nine coats of gesso, chalk mixed with rabbit skin glue, are applied. When dry the surface is smoothed with mild abrasives. Any defect will affect the gold surface.
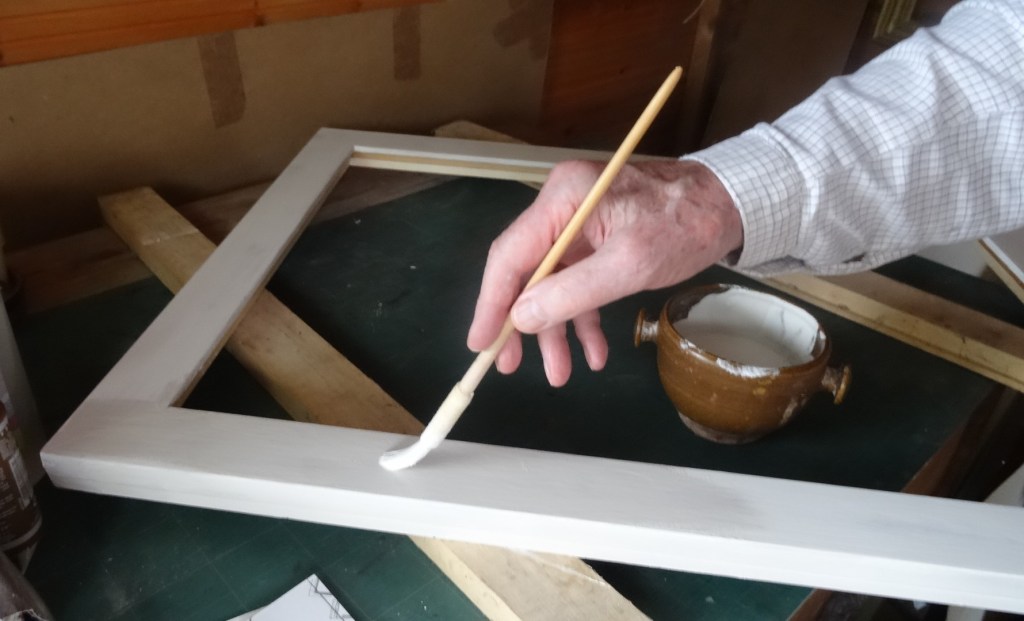
Gesso applied with a string bound ‘mop,’ always left in the gesso. This does not allow contamination of the gesso. Copper ferules are employed now as a choice to string binding. Brush strokes go in one direction only. Experience teaches when to stop brushing.
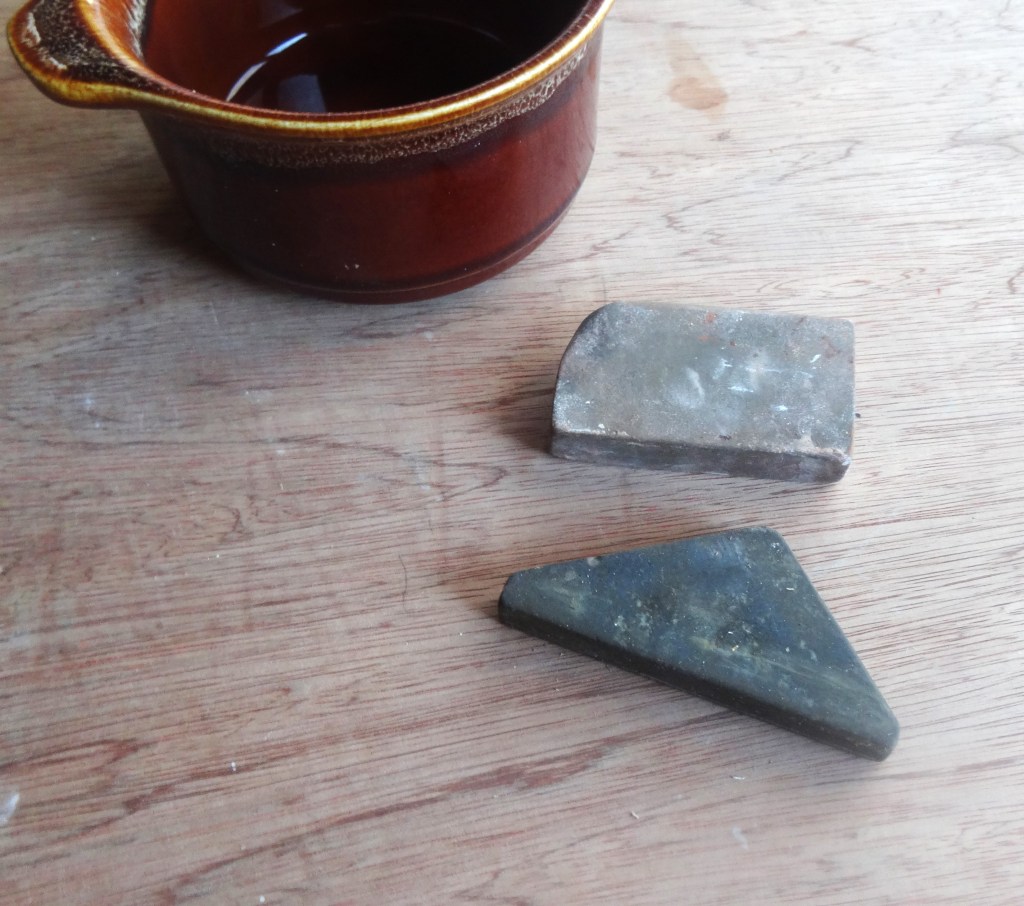
Wet and dry sandpaper is useful for smoothing gesso. Pumice stones have a specific use. These are employed dampened in water to smooth the gesso when dry. They are used to create crisp edges in moulded sections of the frame. Caution is needed to not use the abrasives too vigorously. This can easily wear away the gesso and expose the wood.
Alternative to Gesso: Kaolin, aluminum silicate, can be used in place of chalk to serve as coating. Called ‘Greek Gilding’ it was common in the Mediterranean area in former times. It is applied particularly where there is shallow carving. Two or three coats only are used to not obscure the carving. Kaolin is best not smoothed so must be applied in a fluid, smooth stroke. Gold can be applied directly to this surface. It takes on a pale, frosted appearance.
Kaolin coating applied to a hand carved frame. Four coats were used to not obscure the shallow carving. Kaolin is traditional to Africa for painted objects and body painting. The frame design is a stylized cowrie shell to the inner edge and pipe decoration to the outer edge. Both are common to Africa. A light, gray wash simulating age has been added as final toning.
Final Coatings: Gesso is porous and needs further coverings to seal it. One is to use shellac varnish where oil gilding is used. This ensures the oil size does not sink into the gesso. Where water size is used one or two layers of coloured, fine particle clay are applied. A purpose made brush is used with long bristles. This seals the gesso. The clay is polished with a bristler, a purpose made brush used in the heel of the hand. It gives a suitable substrate on which to apply the gold. Water gilding allows for burnishing (polishing) the gold surface. The result is a deep mirror like shine.
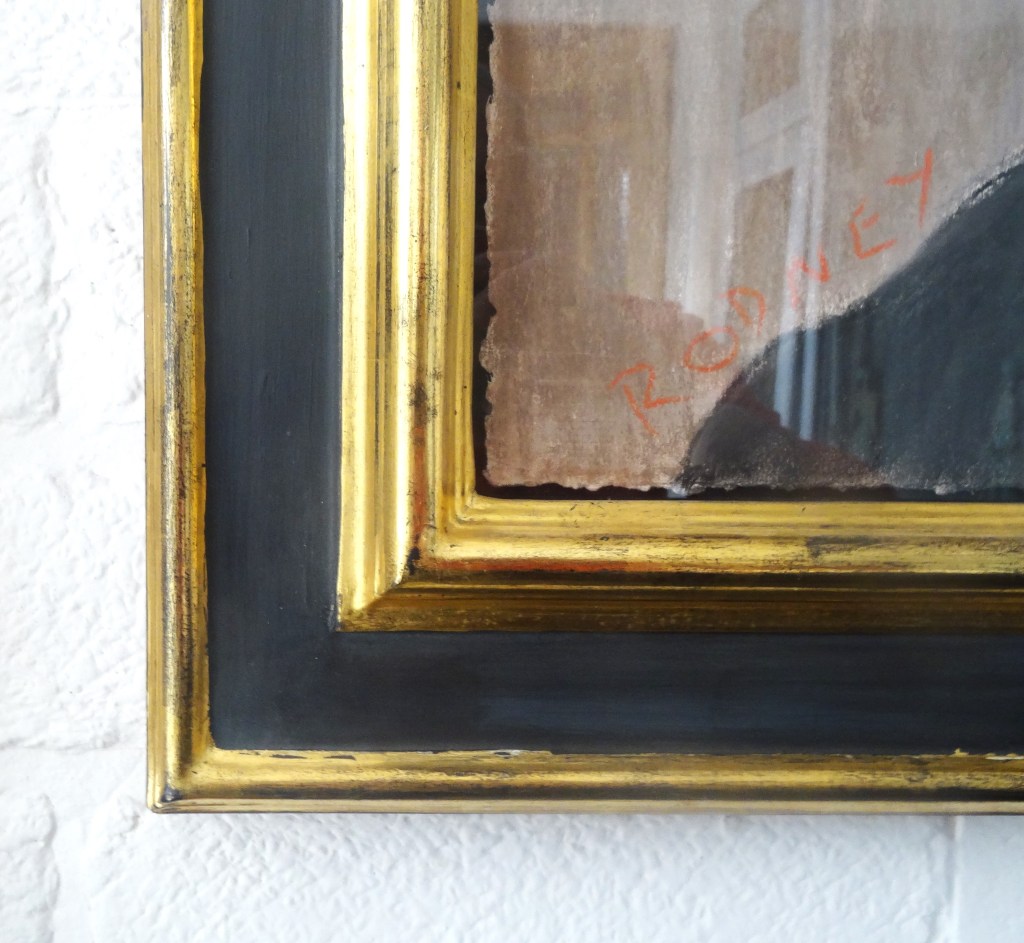
A burnished, distressed finish to gilding on an Italianate, cassette frame. The painting is dark in tone. It needed the brightness of gold in the frame. The colour of the clay substrate on the moulded, gilded sections is black. The flat panel also is painted black. Here care must be taken to not abrade the surface of the gilding too much. This would result in a ‘heavy’ appearance.
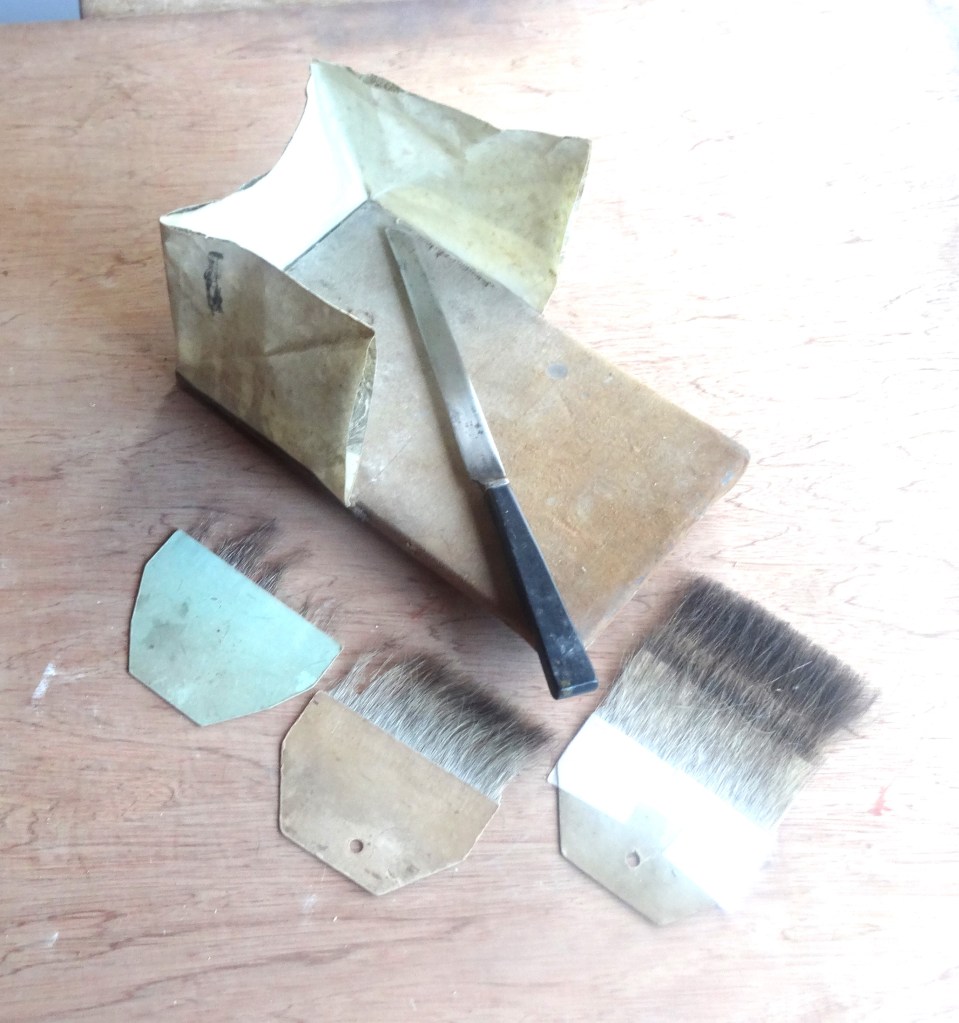
A gilder’s cushion and French knife. These belonged to a mentor of mine, Robert (Bob) Newton. The cushion dates from 1920. Shown are his three gilders ‘tips,’ brushes which are used to pick up the gold before laying. The worn state of the tips indicates the use. The larger tip is two large tips banded together. This gives a greater area of brush. It is necessary when handling full gold leaf which is too big for the large tip on its own.
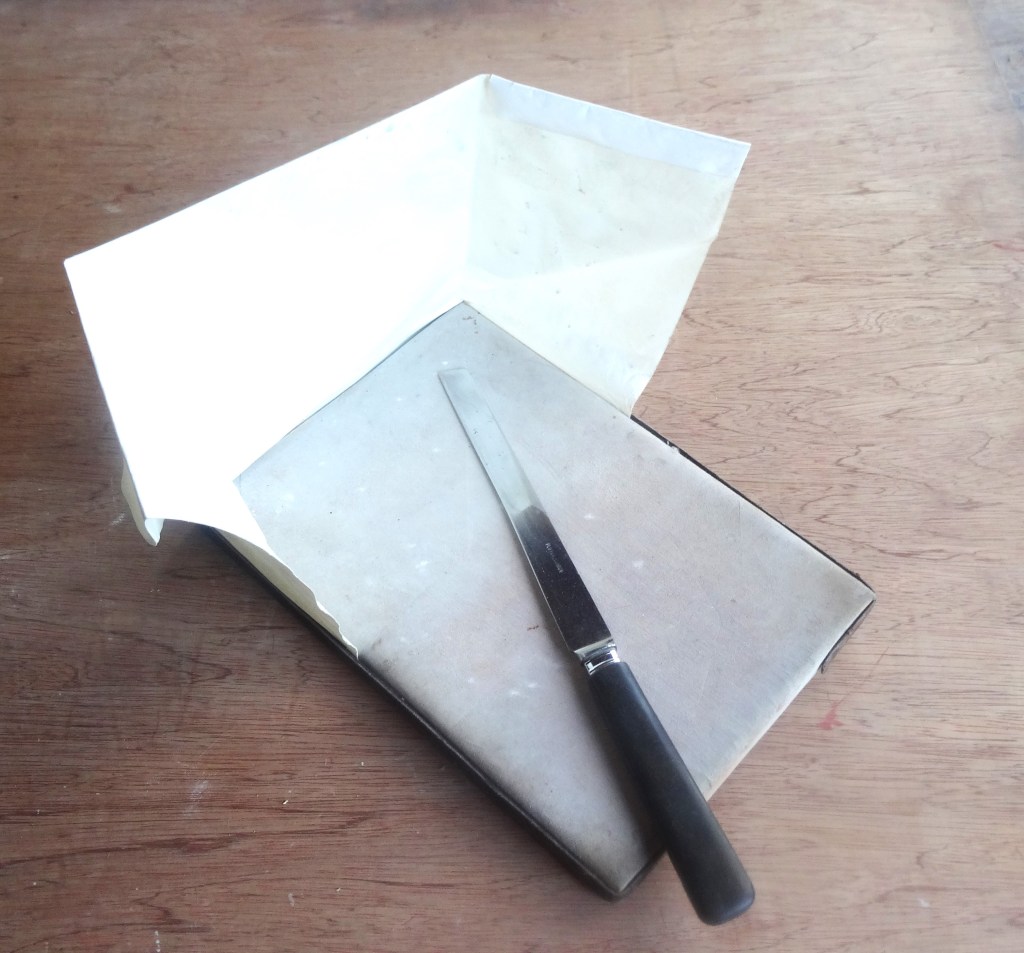
My cushion and French knife. This is smaller than an English knife. The cushion was made by me. It is a French pattern which differs slightly from the English. The gold leaf is first laid onto the cushion before being cut to size. It can then be lifted with the ‘tip’. The screen is to prevent the leaf from being affected by draughts of air. It is very light and easily blown even by heavy breathing.
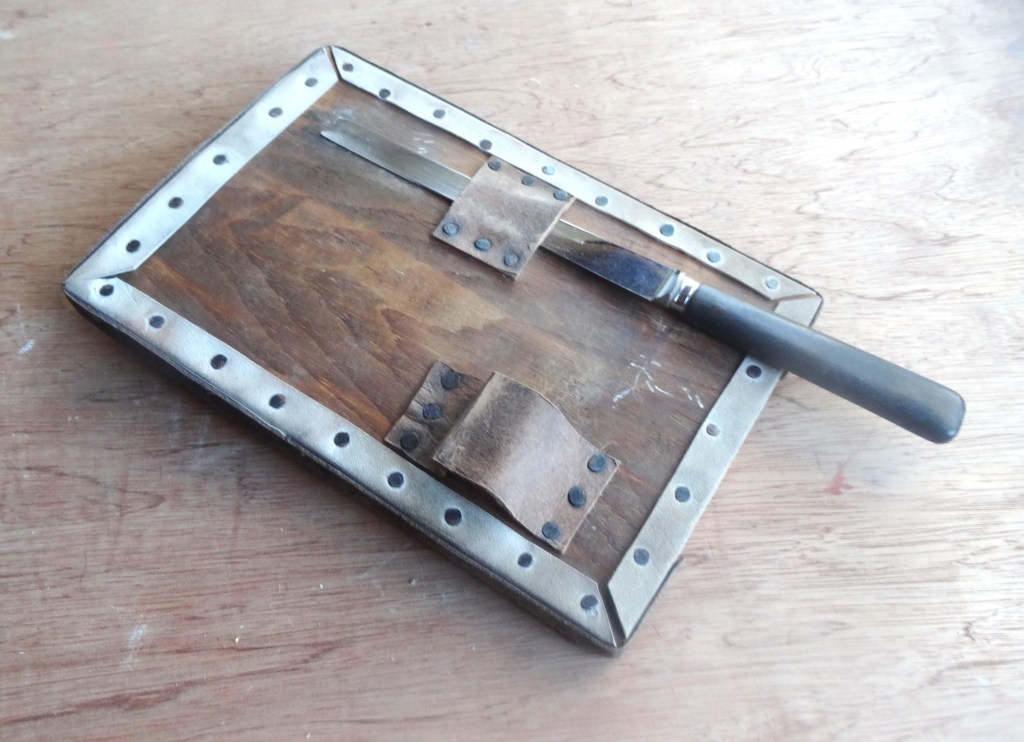
The reverse of the cushion. This shows the thumb piece used for holding the cushion in the left hand. The knife is shown in its holder when not in use. It cuts the gold without cutting the leather cushion. The cushion is first ‘pounced’ with a small bag of chalk to prevent the gold sticking to it.

Method of cutting a gold leaf. The tip of the knife is placed on the cushion beyond the leaf. It is then lowered onto the leaf gently. At the same time the knife is drawn backward until completely off the leaf. This results in a clean cut without snagging the gold. The cut leaf can then be picked up with the gilders tip
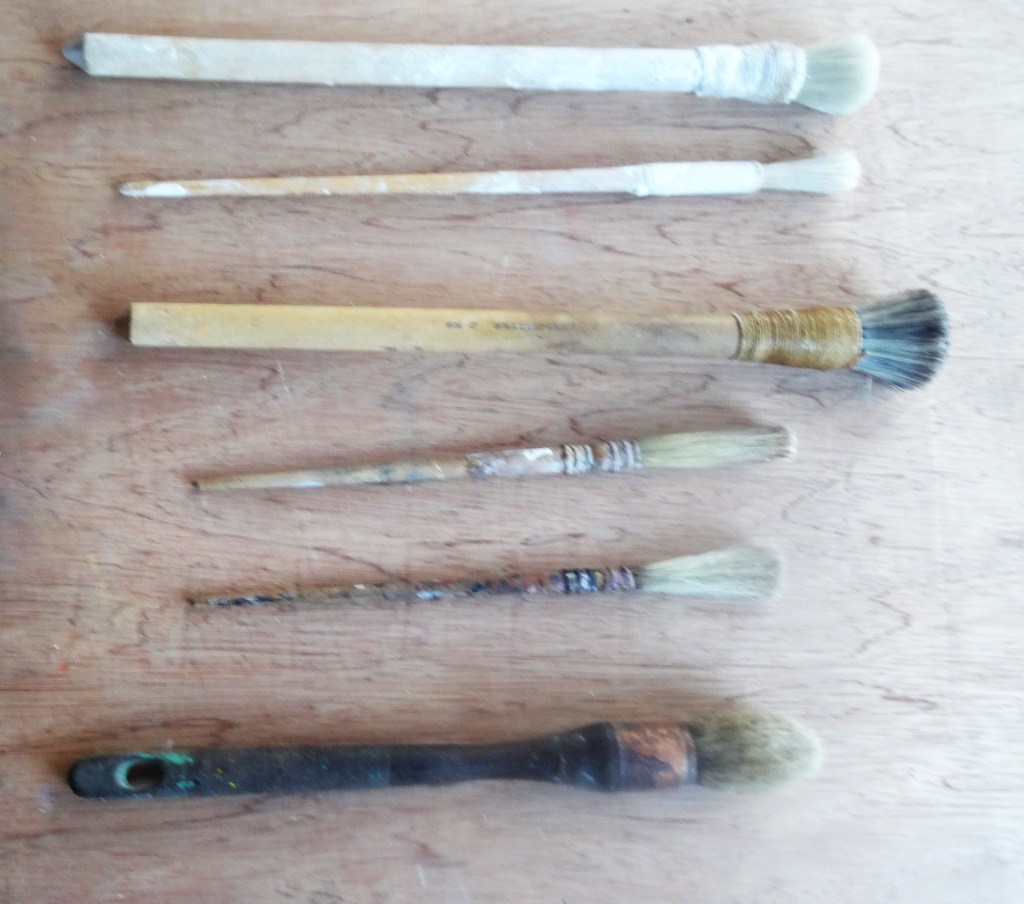
A selection of brushes used in gilding. From the top: Two string bound gesso mops. Then a bristler and two brushes for the top clay coatings. These are applied in a continuous motion without repeated brushing. Then a paint brush with a copper ferule. This brush is for use with traditional paints. That is paint made with animal skin glue. Casein glue, made from cheese, was used in times past.
Natural Wood and Painted Frames
Polished Wood: Plain wood can be stained as desired. It can then be polished with a chain mail burnisher without waxing. If wax polishing the surface is sealed before application to prevent the polish sinking into the wood. Weak, shellac varnish is applied first. Bees wax polish can then be applied to this surface. Several coats are used laid at intervals. After final polishing a deep shine is achieved.
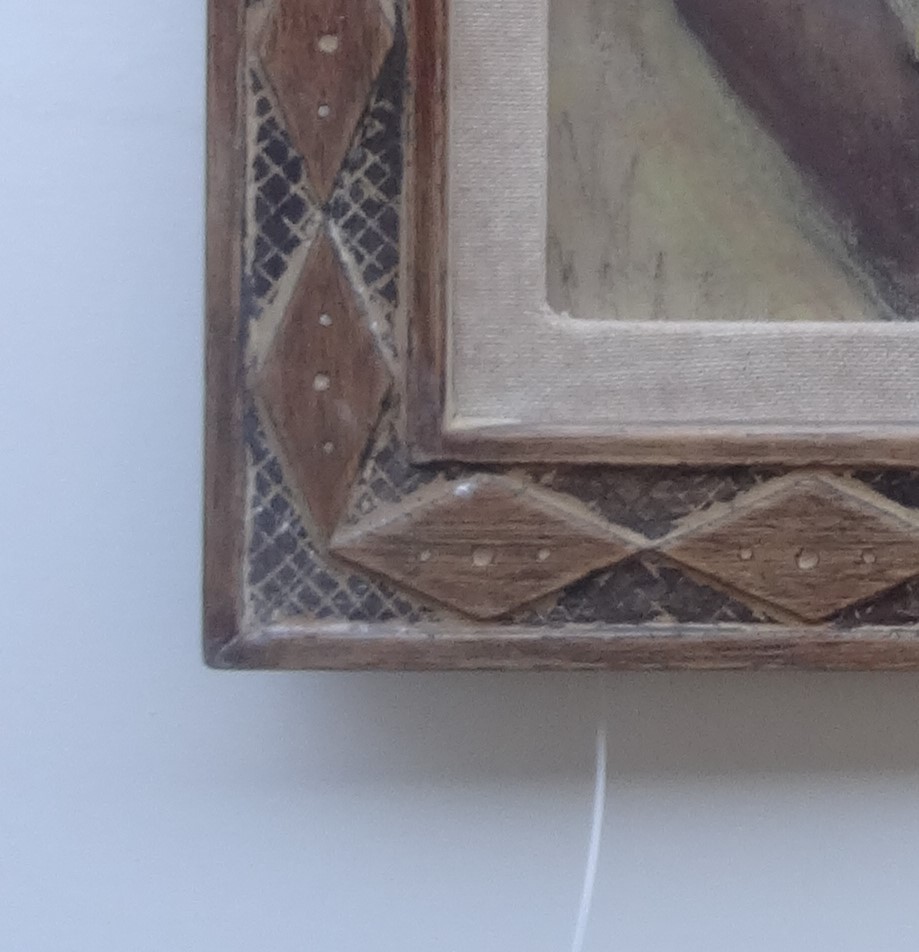
A burnished, wood frame. It features a shallow, hand carved lozenge shape design. The relieved area has been carved with a criss, cross pattern. The lozenge is common to African design and suits the topic of the painting, an African girl. The wood has been stained dark brown then the top, edges, abraded to simulate wear. A final creamy ‘dirt’ wash has been applied to replicate age. The whole is a toned finish applicable to the painting.
Painted Frames: Paint can be matched to any colour. Where desired a colour can be selected from the painting. This will tend to draw the eye into the picture. By automatic reaction the eye is drawn to compatible colours. Weak, transparent paint will mitigate any frame finish. This applies to bare, gesso coated, gilded and plain wood finishes.

Example of a varnish finish on a gessoed frame. The frame has been hand carved. The carving is limited to the corners of the frame. The varnish highlights the carving and gives an aged appearance. The varnish is shellac dissolved in alcohol with added pigment for colour. This is wiped down to the desired degree. The colouration complements the painting. Gilding would have overpowered the picture.
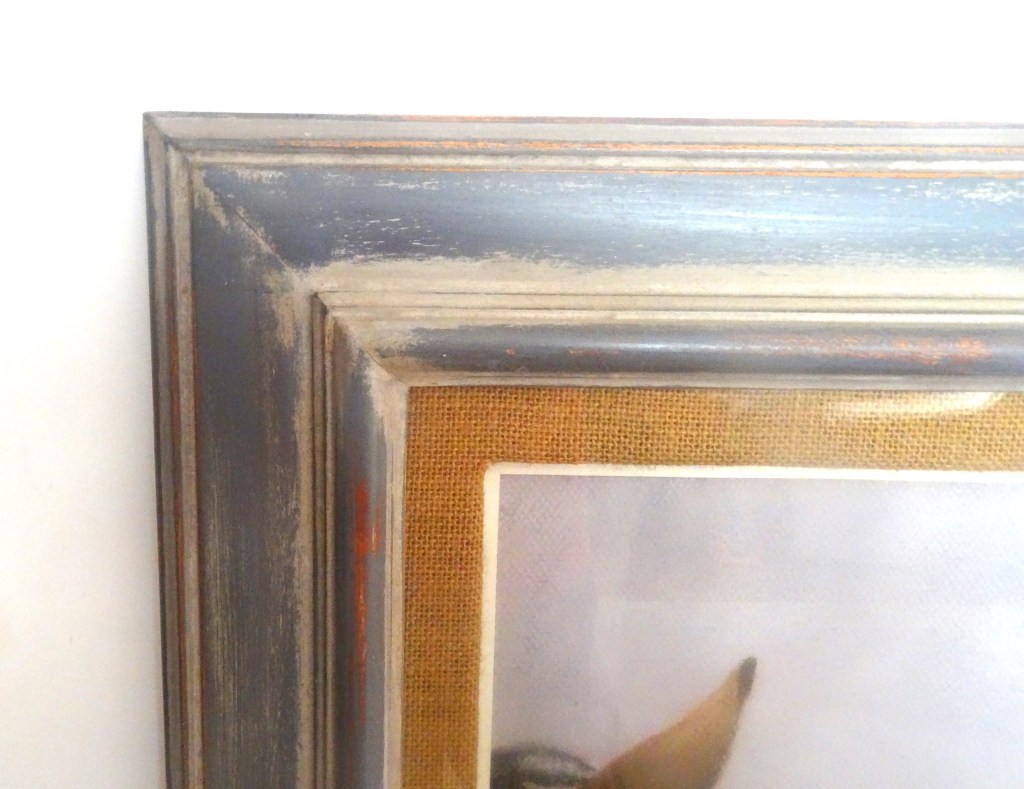
A painted frame. Blue, gray paint has been applied over a red ground. The abraded surface allows the red to show, warming the effect. A toned, gray aging wash has then been applied. The surface is gently wiped leaving the toning wash in the crevices of the frame. The colour compliments a central colour in the picture drawing the eye in.
Aging The Frame
Distressing: Any surface can be aged by abrading. Here an abrasive is used to remove some surface finish carefully. Sandpaper is one choice. An alternative is cotton wool with polish dipped in pumice powder, finely ground volcanic ash. This acts as a mild abrasive. Care must be taken to not abraid the surface too far. This will look unsightly.
Finishing Coatings: Simulated age is further achieved through imitation grime or dirt. This involves laying a coloured wash of weak glue size all over the frame. Then areas are wiped off until the desired effect is obtained. Shellac varnish can be used in place of glue size. The manner of application is the same.
The choice of a suitable frame for any painting is huge. Whatever is decided it must conform to the principal of framing. The principal is: ‘The Frame Must Enhance The Painting.’ It does so by complementing the image. It attracts attention then draws the onlooker’s eye into the painting. Anything inappropriate that forms a distraction is to be avoided.
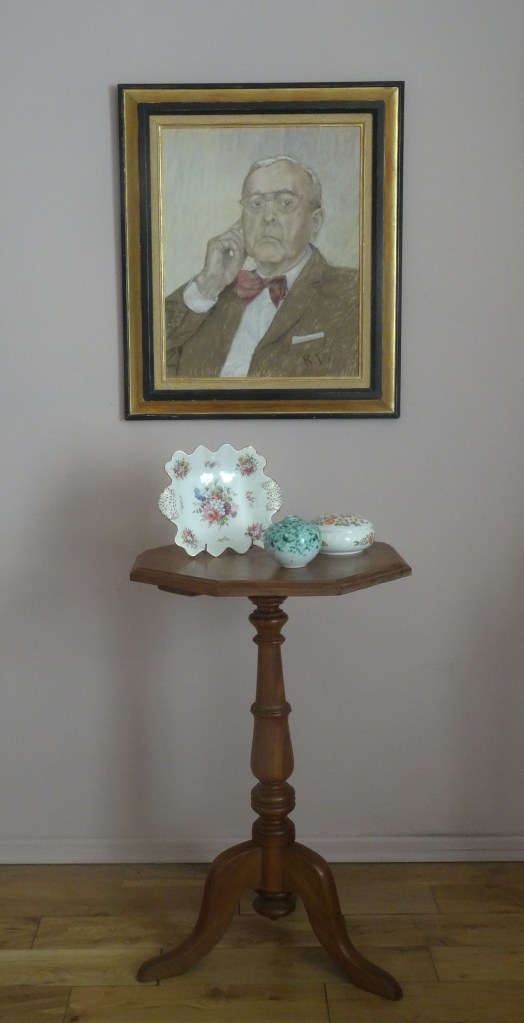
An example of a modern frame teamed with a Victorian pedestal table. The frame is enough to attract attention to the picture. It does not hold the eye but encourages looking into the portrait. A highly decorated, Baroque reproduction frame so popular in galleries would overpower the picture.
The portrait is in natural tones without exaggerated highlights. A strong frame was necessary to draw attention to the painting. Keeping the profile simple prevents the eye from dwelling on the frame. The use of high, strong contrast in colouring adds all the drama necessary. The result is a picture that is equally at home in traditional or modern surroundings. Gold and black are neutral and will fit any decour.
This applies equally to underframing and overframing. Underframing is proposed by those who say: ‘The frame does not matter.’ The suggestion does no credit to either the painting or the artist. It suggests an afterthought bearing no relationship to the picture. It does not encourage the viewer to look deeper into the image. It limits their enjoyment of the painting. Subconsciously it will cause the onlooker to turn away. Similarly overframing will have the same effect.
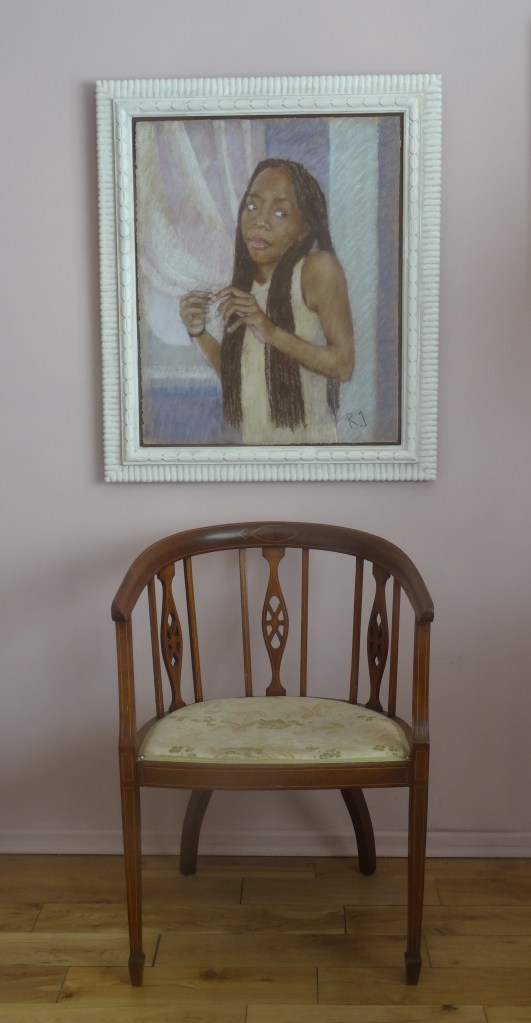
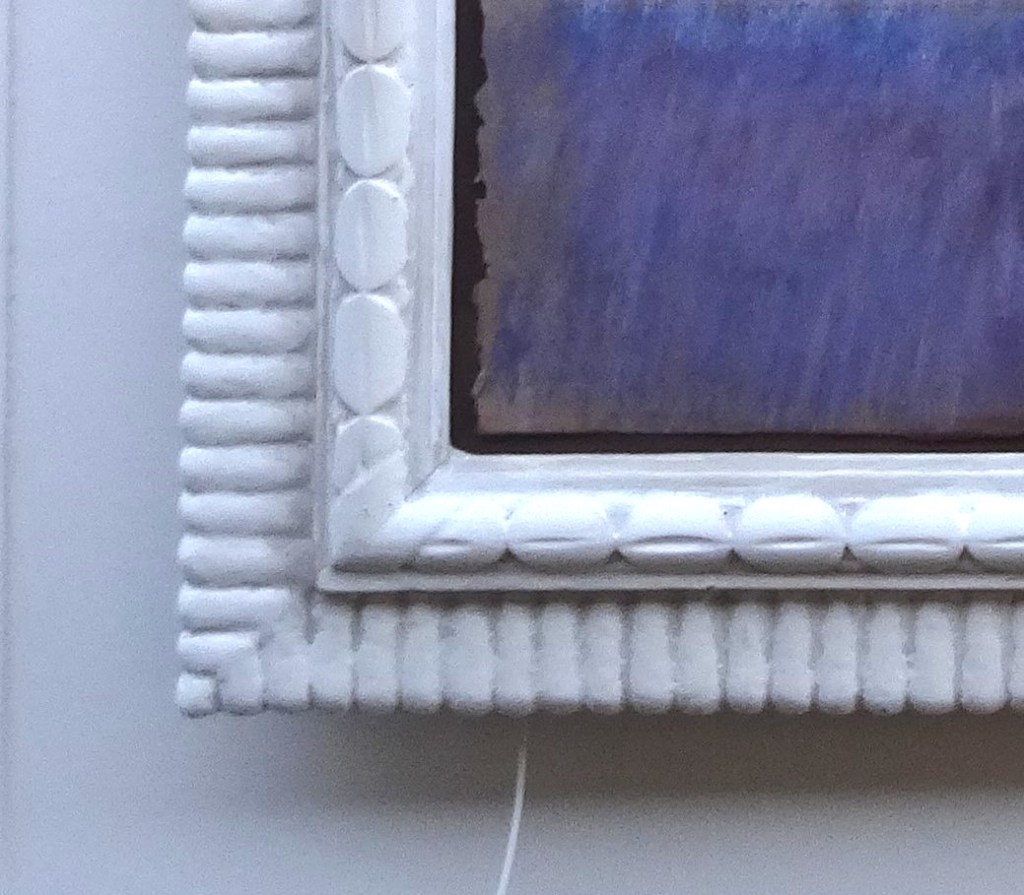
A painting with an artisan style frame goes well with a craft made Sheraton chair. The striking white painted finish and hand carving in the frame arrests the eye. The repetitive motif does not cause the eye to linger on the frame. It allows passage of the gaze into the picture. This is because of the contrast with the strong colour of the image of the girl. The white relates to the white of the eyes, a focal point in the painting.
Coupled with the chair sophistication meets unsophistication. The two complement each other because of the contrast. The picture could equally be teamed with a piece of primitive furniture. An English, artisan table or an African stool. Either would serve the same purpose.
With overframing preconceived notions seems to dominate. The higher the commercial value of the picture the higher the cost of the frame should be. Also, an outmoded tradition often seen is that frames should be gilded. These are often replicas of past styles. Such notions were wrong from the beginning and override the principle of framing. They take no account of the needs of the painting. Also, a grandiose frame used to impress the opulence of the owner defeats the purpose of the frame. It has the same effect as underframing.
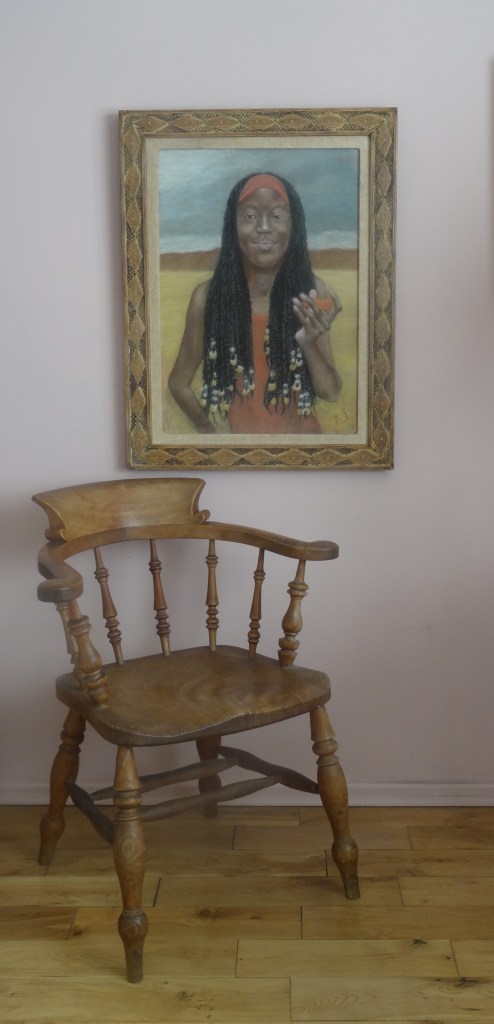
A natural wood, artisan frame is complemented by an artisan chair. The natural wood of both is coupled with the manner of construction. That of by a humble workman rather than a trained craftsman. It presents a finished theme. The workmanship in both is not lacking. They are sturdy and well constructed.
The frame is striking enough to attract the eye without being overpowering. The ‘basic artisan’ approach in the frame is at home with the subject, an African girl. It shows the way an African wood carver would tackle the work. The two tone wood effect perfectly complements the colour of the girl’s skin. The pattern chosen, the lozenge, is widely used in Africa. It completes what Whistler would have called ‘harmony.’
From the forgoing it is clear how important the correct choice of frame is. The framing of original artworks is hence best left to those who understand it. This will range from an academically qualified person to a craftsman trained in hand made framing. Unreasonable limits within this range should not be set. Academic qualification does not automatically fit someone to make the choice. Nor does experience in frame making alone. It is the trained eye that fits a person to make the choice.
The artist who is in tune with their own work is well placed to decide the appropriate frame. This requires they learn the art of frame making. The idea sounds extreme but when viewing the frame as part of the picture it becomes sensible. To make their own frames is a rewarding experience for any artist. It continues the integrity of the painting in the best way possible.
*For further reading on the subject see: Dorure et polychromie sur bois (Gilding and polychrome on wood), Gilles Perrault. Available in French only.
